Showing posts with label food. Show all posts

Friday, August 05, 2011

Quick foodie post: French Baguettes

I love bread, but really shouldn't be eating it, I put on weight too quickly if I don't watch it! Well, last weekend I baked bread anyway. I usually have this big box stored in the garage, I can't believe I've had my bread machine for about 10 years and still works like a charm.


I decided to dust it off and make use of it.  It does make it easy to bake bread or just make the dough and then form your loaf and bake in the oven, which is what I did this time. I usually don't, either I'm too lazy or don't have the time to deal with it. This is the first time that I made French baguettes ...


Easy recipe, too!

French Baguettes
1 cup water
2 3/4 cups bread flour
1 tablespoon sugar
1 teaspoon salt
1 1/2 teaspoons bread machine yeast (I used 2 teaspoons of active dry yeast)
1 egg yolk
1 tablespoon water
  • Measure carefully, placing all ingredients except egg yolk and 1 tablespoon water in bread machine pan in the order recommended.
  • Select dough/manual cycle.
  • Remove dough from pan with lightly floured hands. Place dough in greased bowl, turning to coat all sides. Cover and let rise in warm place about 30 minutes or until double.
  • Grease cookie sheet. Punch down dough. Roll dough into rectangle, 16x12 inches, on lightly floured surface. Cut dough crosswise in half. Roll up each half of dough tightly, beginning at 12-inch side. Gently roll back and forth to taper ends. (I think I just rolled it up, mine doesn't look tapered)
  • Place loaves 3 inches apart on cookie sheet. Make 1/4-inch deep diagonal slashes across loaves every 2 inches, or make 1 lengthwise slash on each loaf. Cover and let rise in warm place 30 to 40 minutes or until double.
  • Heat oven to 375F. Mix egg yolk and 1 tablespoon water; brush over tops of loaves. Bake 20 to 25 minutes or until golden brown. Serve warm or cool on wire rack.
From Betty Crocker Bread Machine cookbook


Okay, back to my craft room!

Shared with Food on Fridays

Friday, July 09, 2010

Eggplant and Four-Cheese Cannelloni

It's been another busy week, and cooking for my family, of course, but not remembering to take photos! Need to remember to have my camera handy. Anyway, when I was on my crepe-making spree a few weeks ago, I made this delicious eggplant and four-cheese cannelloni recipe.


 I was online looking up crepe recipes and found a video of Sara Moulton making crepes and then filling them with cheeses, I just had to try it.

Sara's Eggplant and Four-Cheese Cannelloni

12 crepes
1 med. eggplant, peeled, and cut crosswise, about 1/3" thick
3 tablespoons extra-virgin olive oil
3/4 cup freshly grated parmigiano reggiano cheese
1/2 cup coarsely grated mozzarella cheese
1/2 cup coarsely Italina fontina cheese
1/2 cup whole milk riccotta cheese
2 cups homemade tomato sauce or your favorite store bought tomato sauce (I used my marinara sauce)
1/4 cup shredded fresh basil, for garnish

Preheat the oven to 375F.
Brush both sides of the eggplant slices with oil and sprinkle with salt and pepper. Arrange in one layer on a large sheet pan lined with parchment (I used my Silpats). Bake until tender, about 40 minutes. Remove from the oven and let cool. Combine the cheeses and season lightly with salt and pepper.
Top each crepe with 2 to 3 eggplant slices. Spread 1/6 of the cheese mixture just inside the edge of the crepe. Roll up to enclose the cheese and eggplant and arrange it seam-side down in a gratin or shallow casserole dish.
Pour the tomato sauce over all the crepes. Top with additional grated Parmesan, if desired.
Bake until the sauce is bubbly and the cheese is melted, about 30 minutes.
Serves 6.


Oh, and it freezes beautifully!


Friday, July 02, 2010

Tortilla Press

How funny I just got a King Arthur Flour email today after my post about making corn tortillas. They have a tortilla press like mine, but way more expensive and I'm sure of better quality. Also a recipe on making soft flour tortillas using the press. I thought flour tortillas had to be rolled out by hand using a rolling pin, not made with a press like corn tortillas. I might have to give their recipe a try.

Corn Tortillas

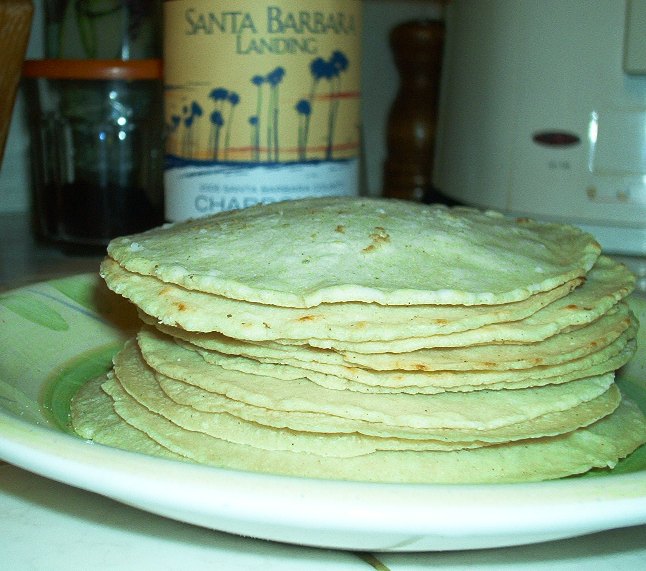
Okay, so I'm at work on Tuesday thinking about what am I going to eat for dinner. I already had some chili thawing in the fridge, but I was also thinking about having salad and corn tortillas with it. I have salad, I always make a bowl of green salad every few days for my husband and I. I was too lazy to stop at the store to pickup a package of corn tortillas, plus I'm always going to the grocery store to pickup something that I ran out of or forgot on the last shopping trip. I knew I had masa in my pantry from when I made tortillas with the students on Cinco de Mayo, so I figured I can easily and quickly make tortillas when I got home.


This recipe is from the back of the package. Oh, before I forget you'll need a tortilla press. They are pretty inexpensive from Latino markets, which we have plenty of around here.

Corn Tortillas
makes 8
1 cup masa
1/8 teaspoon salt
2/3 cup water

Combine masa, salt and about half the water for about 2 minutes to form soft dough. If dough feels dry, add more water (one tablespoon at a time).

Divide dough into equal balls. Cover with damp cloth to keep dough moist. Line a tortillas press with thick plastic wrap (like a plastic storage bag cut apart, but I used Glad Wrap and it worked out fine). Place each ball between plastic and press until tortilla measure 5 to 6 inches in diameter. Carefully peel off plastic wrap.


On preheated ungreased griddle or skillet on medium-high heat cook tortillas one at a time for a 50 seconds. Turn, then cook the second side for another 50 seconds. Cover tortillas with cloth napkin to keep soft and warm. (I pressed, then cooked one at a time, sort of moved them around on my griddle as I went along, as you can see in photo)


Next time I'll make them bigger, they came out a little small.

It may sound difficult, but very easy and kind of fun. You can store these in the fridge for up to a week, and then reheat on the griddle or microwave. Hope you try these, can also be used for tacos and fried for tostadas!

Linked to Food on Fridays

Friday, June 18, 2010

Crepes!


Every once in a while I get on one of these cooking kicks, lately it's been anything with vegetables (I've been vegetarian for almost a year!) This week I made crepes, actually it was Spinach & Ricotta Crepes from the book Crepes: Sweet and Savory Recipes for the Home Cook, and they were delicious. Just as good as left-overs, believe it or not. Here's the recipe, photo not so great because I used my cell. Crepes are so easy to make, I don't know why I don't make them more often. You can make them ahead of time and refrigerate or freeze. It's sort of therapy for me to make a batch of them ahead, as I did again this morning.

Here's the recipe, I can post the basic crepe recipe, but I think any crepe recipe will be fine (I found that there are very many different versions).

Spinach & Ricotta Crepes

8 crepes, 6- or 7-inch (not sweet)
2 pounds fresh spinach, about 2 bunches, stemmed and washed
1 1/4 cups ricotta cheese, 10 ounces
1 egg, beaten
1/2 cup shredded Jarlsberg cheese or crumbled feta or aged goat cheese, 2 ounces
1/4 teaspoon freshly grated nutmeg
salt and freshly ground pepper
1 tablespoon olive oil or melted butter
2 tablespoons grated Parmesan cheese

Prepare the crepes. Preheat the oven to 350F. Cook the spinach in a covered pan over medium heat for 1 minute, or until slightly limp. Drain the spinach and press out the excess water with the back of a large spoon, then chop finely. In a medium bowl, mix together the ricotta, egg, Jarlsberg, feta, or goat cheese, nutmeg, spinach, and salt and pepper to taste.

Spoon 1/2 cup of filling in a ribbon down the center of each crepe and roll up. Arrange in a greased 9x13 inch baking pan. Brush the tops with the olive oil or butter and sprinkle with the Parmesan cheese. Bake in the oven for 10 to 15 minutes, or until heated through. Serve at once. Makes 8 crepes; serves 4.
Lou Seibert Pappas, Crepes: Sweet and Savory Recipes for the Home Cook


Saturday, June 12, 2010

Classic Creamy Coleslaw

Yikes, sorry I'm late! I can't believe it's Friday already! I mean I'm happy about it, but really this month is flying by too fast. Only a few more days left of school and I'll be thinking about taking time off from work. Anyway, here's something I made during the week. I've only made coleslaw once before, I'm not really a big coleslaw fan, but lately I've been wanting it and homemade is so much better than what you get at the markets. This recipe is pretty good and very easy to make. I used used light mayo and sour cream, and only about a tablespoon of grated onion. I think this will be my next potluck take along. This recipe is from the Martha Stewart website.

coleslaw and pizza

Classic Creamy Coleslaw

1 tablespoon Dijon mustard
1 tablespoon cider vinegar
1 tablespoon freshly squeezed lemon juice
1 tablespoon sugar
1 teaspoon course salt
1/2 cup mayonnaise (I used light)
1/4 cup sour cream (light again)
1 small green cabbage, finely shredded (about 1 3/4 pounds)
2 medium carrots coarsely grated
1 small onion, coarsely grated, optional (1 tablespoon instead)

Whisk together mustard, vinegar, lemon juice, sugar, salt, mayo and sour cream in a small bowl. Combine cabbage, carrots, and onion in a large bowl. Pour in dressing, and toss thoroughly. Refrigerate, covered, until coleslaw begins to soften, 1 to 2 hours. Can be covered up to 2 days. Just before serving, toss coleslaw again.


Food on Fridays

Friday, June 04, 2010

Food on Fridays: Focaccia

Every once in a while I get a craving from something bready and cheesy. Actually this doesn't have that much cheese on it, and I tried to make it healthy by using half whole-wheat flour. I think I have tons of similar recipes, but searched online anyway for a focaccia recipe that the dough can be made in the bread machine. I wanted to make it before I left for work and then just assemble it when I came home. Anyway, here's the recipe from my wooden spoon, with my little changes. Well, my big changes because I wanted to add cheese, onions, etc. Really, really easy and can be made by hand if you don't have a bread machine.

Focaccia Bread

1 cup + 2 tablespoons water (80F/27C)
1 tablespoon olive oil
1 1/2 cups all-purpose flour (I used bread flour)
1 1/4 cups whole-wheat flour
1 teaspoon table salt
1 teaspoon white sugar
1 teaspoon garlic powder
1 teaspoon dried oregano
1 teaspoon dried thyme
1 teaspoon dried basil
1 tablespoon active dry yeast

Topping:
carmelized onions and garlic in olive oil
sliced olives
Mozzerella cheese, grated
Parmesan, grated
Kosher salt
cracked black pepper

Add water and olive oil to breadmaker pan. Then add salt, sugar (I used agave nectar), garlic powder, oregano, thyme, basil, and flour. Make a well in center of flour and add yeast. Set bread machine to dough cycle.

With oiled hands, evenly press dough into a greased 9x13 inch pan ( I used a 9x13 glass dish). Cover and let rise in warm place for 30 minutes or until double in size. While the dough is rising, prepare topping.

Use fingers to press dimples into dough. Spoon topping over dough. Sprinkle with remaining ingredients. Bake at 425F for 20 minutes or until done.

(sorry for the terrible photo, I used my cell phone and didn't think I was going to blog about it, otherwise I would have used a real camera and take a nicer photograph.)


Enjoy!


This is my first post for Food on Fridays, hope to do more since I love to cook but not great at blogging about it.

Have a great weekend!

Monday, April 20, 2009

Caponata Panini

Here's another recipe I picked up from Giada at Home on the Food Network. Although, I was inspired by Martha Stewart's Sandwich Show that aired a few weeks ago. This recipe was very easy, tasty and made quite a bit. Giada made the sandwiches on French rolls, but I wanted to use the focaccia that I already made the day before.

Caponata Panini

1/4 cup olive oil
1 med. onion, chopped
1 celery stalk, chopped
1 med. eggplant, cut into 1/2 inch cubes
1 red bell pepper, cored, seeded, and cut into 1/2 inch pieces
1 can diced tomatoes with juices, (14 1/2 oz.)
3 tablespoons raisins
1/2 teaspoon dried oregano
1/4 cup red wine vinegar
4 teaspoons sugar
1 tablespoon drained capers
1/2 teaspoon salt, plus more for seasoning
1/2 teaspoon freshly ground black pepper, plus more for seasoning

In a large skillet, heat the olive oil over medium-high heat. Add the onion and cook until translucent, about 3 minutes. Add the celery and eggplant and cook until soft, about 3 to 4 min. Add the red bell pepper and cook until crisp-tender, about 5 mins. Add the tomatoes, raisins, and oregano to the pan. Simmer over medium-low heat, stirring frequently, until the mixture thickens, about 20 mins. Stir in the vinegar, sugar, capers, 1/2 teaspoon of salt and 1/2 teaspoon of black pepper. Season, to taste, with more salt and pepper, if needed.

capanata

I know not the most attractive photo, but very good when made into a sandwich. I used focaccia, split, with provolone cheese. I grilled on my stovetop grill with an iron skillet pressed on top. Mmm, the perfect lunch.

capanata panini and salad

I 'm tempted to buy that Cuisinart Griddler Express that was on Martha's show, but I realize that it's not a priority at this point in time. It would be a nice Mother's Day gift, though.

Enjoy the recipe!

~Billie

Saturday, April 18, 2009

Banana Nut Muffins

I know it's been a while since I've posted. I do have a little bit to write about, but I just can't get myself to sit down and write. I have alot of things going on and it just boggles my mind at the moment, I've been taking pictures left and right so that I can write about it, but I tend to get side tracked.

banana nut muffins

Anyway I made these delicious muffins about a week or so ago and I wanted to post the recipe. For some reason I think it was because I mixed it in the food processor that they tasted so good. The food processor is something new for me, I mean I've had it for a few years, but I really don't use it that much. I know I can chop up veggies and hard cheeses, but that's about it. I did make pizza dough one time, it worked out well. So here's the recipe for banana nut muffins that I worked out for the food processor.

Banana Nut Muffins

3 large bananas
1 1/2 cups all-purpose flour
1 teaspoon baking powder
1 teaspoon baking soda
1/2 teaspoon salt
1 egg
1/2 cup white sugar
1/3 cup melted butter
1/2 cup chocolate chips (optional)
1/2 cup nuts (optional)

Preheat oven to 350F degrees.
Mash bananas in food processor; add the slightly beaten egg and sugar.
Add melted butter.
Add in the dry ingredients. Stir in chocolate chips and/or nuts.
Spoon the mixture into paper muffin cups in a medium-sized muffin pan.
Bake for about 20 minutes.

Servings: 12

Enjoy!

~Billie

Sunday, March 29, 2009

Chocolate Honey Almond Tart

Oh, Giada, you are going to get me into trouble! I watched Giada at Home yesterday and had this idea in my head to make a couple of her recipes. This one I had to make last night to enjoy today. If you love chocolate, you'll love this. I had to make some substitutions, though. I searched yesterday for chocolate graham crackers for the crust and couldn't find them at two markets and I wasn't about to drive all over town. I saw Nabisco Chocolate Wafers and just thought 6.00 was too much for a little box of cookies, but the Chocolate Teddy Grahams were on sale at Albertsons, 2 for 6.00. It looked like it had the same type of ingredients as graham crackers, so I bought a box and I'll just whirl them in food processor. Yay!

Anyway, very easy to make and very good! Here's the recipe.

Next post: another recipe and update photo of the quilt I'm currently working on.

Have a great day/evening!
~Billie

Friday, August 08, 2008

Fried Rice

Ooops, and again I forgot to take a photo, but I guess you all know what fried rice looks like. It was nice to cook with the children, they help me put the ingredients together and watch with anticipation. It gives me a chance to just sit and talk with them about other things, as well.

Cooking the Chinese Way by Ling Yu. This is a great book to share with children and has some simple recipes that can be easily prepared and shared. It also had a little bit of info about cultural festivities, history, the land, cooking techniques, ingredients, and even low-fat variations.

I think since this week was such a success, we may be intergrating cooking some how into next week's theme, "Friendships". We are winding down are summer program as school starts in two weeks.

Okay, I'll stop with the food! I promise my next post will be something crafty.

Have a great Friday!

Wednesday, August 06, 2008

My crepe experience

Well, after making a dozen crepes yesterday, I went to the library and then to Von's Market to buy the premade ones, which I looked all over and then had to ask a staff member where they were. They were a square shape in a package near the fresh fruit (of course!), but I didn't expect a square crepe. I ended up buying only one package of 10, because it was 4.99 per package! I need at least 30 or 40 crepes! So I went back home whipped up two more batches. I was literally sweating over a hot stove! But it was well worth it, I don't know how many crepes I made but it was at least 3 dozen, plus the store bought ones. The children enjoyed them, some had them with strawberry jam, some had them with Nutella, and then some just wanted it plain with powedered sugar sprinkled on top. I also read the story "Crepes by Suzette" by Monica Wellington. It's a very cute story about a young girl who is a crepe street vendor. This book also include a recipe and French words for the children to learn.


I also shared the book "Cooking the French Way". This is in a great series of books for children I found at the library, I also checked out "Cooking the Chinese Way". I'll be making fried rice on Friday. I don't need a cookbook for that, but I like the children to see the different types of food around the world. It has great color photos. This has been a fun week at work.

I forgot to take a snap of the finished product this morning, but I know I'll be making these again. I'm going to make Chicken, Spinach and Mushroom Crepes for dinner tomorrow because I still have those pre-made ones. I have know idea how they taste, I hope as good as my homemade ones.

Have a lovely evening (or day).

Saturday, July 05, 2008

Homemade ice cream

As you can see it's a bit creamy after 5 hours in the freezer, but still yummy for low fat.

I topped it off with whipped cream after the photo shoot - so much for low fat! Next time I'll make real ice cream!

Perfect day for ice cream

I thought today was a good day to make ice cream, plus I needed to dust this guy off and make use of it again. I don't make ice cream often enough, but I don't think I could give up this very cool gadget. After all, ice cream is my favorite dessert!

Here's the recipe from the Ultimate Ice Cream Book, I got this recipe from the Cooking Light forum a couple of years ago. I make this at least once or twice a year.

Lowfat Vanilla Ice Cream
2 cups 1% milk
2 eggs, plus 2 egg yolks
1 can fat-free sweetened condensed milk (14 oz)
4 teaspoons vanilla

Lightly beat eggs and egg yolks in a medium mixing bowl with a whisk and set aside. In a medium saucepan over low heat bring milk to a low simmer. Slowly add hot milk to eggs, mixing with whisk. Return egg/milk mixture to pan over low heat and simmer until custard thickens slightly. Do not allow to boil or the eggs will scramble. Pour custard through a strainer into a large clean bowl, then whisk in sweetened condensed milk and the vanilla. Cover and refrigerate overnight or until chilled, then freeze in ice cream freeezer as directed.

You can throw in 1/2 cup of chocolate chips at the last 5 minutes of freezing time, if you like. It looks difficult to make, but it really isn't.

Enjoy!

Sunday, April 06, 2008

Fondue, Cupcakes and Wine

Yesterday my daughter celebrated her 23rd birthday with her friends at the house. Well, it was supposed to be a pool party and bbq. Forget the "pool" part, it was cold and overcast and I know the water is too cold for swimming. We don't heat the pool, except for the spa, since the gas and electric bill has almost doubled with having a pool. Anyway, her friend suggested she have a fondue as one of the appetizers. I have never made fondue but always wanted to try it. It was easy, fun and very tasty. Yumm, I'm definately making it again!. Friday I spent the evening making 4 dozen chocolate and vanilla cupcakes and it was well worth it. The cupcakes were a hit, especially the vanilla! I wish I had taken a picture they looked so cute and a real eye-pleaser on the food table when the guests walked through the kitchen to the patio. The recipe is on the Martha Stewart website, which is from Billy's Bakery in NYC. They are delicious, and if you want a good cupcake recipe this one you have to try.

Billy's Vanilla, Vanilla Cupcakes

And here's a funny, I was talking to my mom yesterday and telling her how I came home from work after stopping at the store and buying last minute things for the party and I was sort of frazzled-out from a week of working "fulltime" which I'm not use to doing and knew I had to get going on those cupcakes. She laughed when I told her "forget it, I'm baking but I'm also having a glass of wine or two while I bake!" Thank goodness, I didn't screw up the recipe.

Thursday, December 20, 2007

It's that time again

Oh, yes, I have been anxious to make tamales all week. My daughter is out of town and isn't expected back until tomorrow and looks forward to making tamales, too! So I have Sunday reserved for our tamale day. My family lives far away, it would be nice if they were here with us, but it's not happening this year. Anyway, today I made a practice batch, after all this is my second time making tamales on my own, so I need the practice. In previous years, we would visit my Mom in Sacramento for Christmas and make tamales. She taught me how to make them and encouraged me that I can do it! Well, since this is my practice batch and this recipe looked very easy and not such a large batch to deal with, I went for it. I must say they were pretty tasty and a cinch to make with the help of a little gadget that I bought on ebay.

Here's the recipe from this month's Cooking Light. Okay, mine didn't look as pretty as the picture, but they tasted pretty good.
Here's the Mas Tamales Masa Spreader that made life a little easier when making tamales. Actually, I shouldn't wait until Christmas time to make tamales, they can be made and enjoyed any time of the year.

Saturday, August 11, 2007

Nice Day in Del Mar

We spent most of the day with my cousin and her husband at the farmer's market in Del Mar (San Diego). The traffic was hideous getting down there and we're only a few miles north, but it was bumper to bumper all the way! My daughter and I have been spending alot of time together since she's moved back home, which is very cool. She's a great kid and little does she know I enjoy every minute with her! Anyway, my cousin started a cheesecake business last year and has been doing pretty good at getting her name out there and filling orders. Today was her first at a farmer's market and so we stopped by for moral support, but she looked like she didn't need any, she was selling her mini cheesecakes like "hotcakes"! In the mean time my daughter has been interested in starting her own business selling handmade purses. So she was very interested on how my cousin works her business at different venues. It was a very interesting day, there were alot of nice people there selling there wares and easy to talk to and get to know. Looks like I'll be hanging out at various farmer's markets in the near future.

Wednesday, December 27, 2006

Corn Tortillas

I don't know why I don't make these more often, they are so easy to prepare and taste so much better than the ones you buy in the store.

Tuesday, December 26, 2006

Tamale Tradition

Every year for Christmas we drive up to Sacramento and stay with my Mom for the holiday. We always make tamales on the day before Christmas Eve, but this year due to unforseen circumstances we stayed home. I still wanted to continue the tradition of making tamales and my daughter insisted on it! I've never made them on my own, Mom had always done all the preparations and the rest of the family assembled the tamales and she steamed them in her big pots. Well, I was up for the challenge; I cooked the beef, shredded it and made the sauce, went to the local Mexican market and bought prepared masa (I did try to make it from scratch, but that's another story!), and my daughter and I assembled them. Oh, and another thing, I didn't have a tamale steamer, what was I thinking! So I rigged up one with a huge stock pot, one of those small vegetable steamer and a pie plate punched with holes by my husband who does not eat tamales, but knew how important it was for my daughter and I to make them. It all worked out, we made them on Christmas Eve morning and shared some, froze some and had them with our turkey dinner on Christmas day. We didn't make alot as most families do, more like 50 and they are of random sizes, but they tasted delicious. I'm looking forward to making them again. Oh yeah, I'll make sure I have a real tamale steamer! Here are my "first tamales".


Beef Tamales

Sunday, December 10, 2006

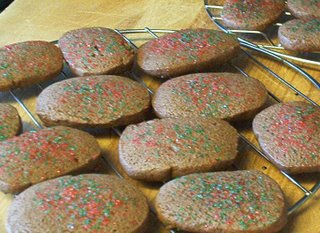
Chocolate Cut-out Cookies?

Well, that's what I planned to bake today, but when I mixed the dough it seemed too dry and I thought maybe they forgot to add an egg to the recipe. Yeah, so I added an egg, still did not seem right so I added another one . . . well, I already knew that this was not going to work. So I wrapped up the dough into a couple of logs and decided that I would just slice and bake. It did turn out to be a very tasty cookie.

I'm back cross-stitching

  Well, not yet, but real soon because my daughter found a Halloween cross-stitch booklet that I thought I lost forever. So my plans are to ...